
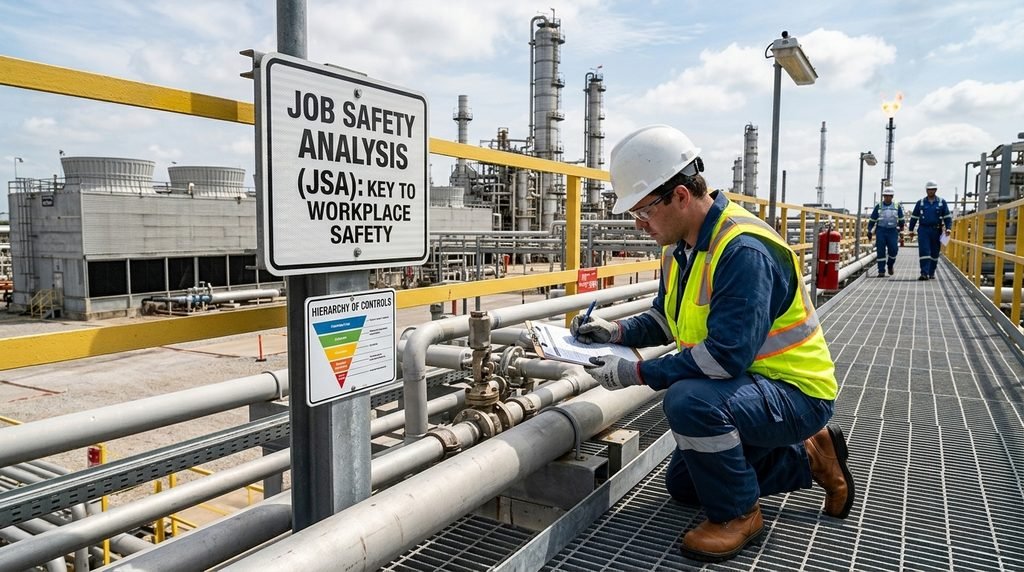
A Job Safety Analysis (JSA)—also commonly referred to as a Job Hazard Analysis (JHA)—is one of the most effective risk assessment tools in modern occupational safety and health management. Whether you operate in oil and gas, construction, heavy manufacturing, or chemical processing, implementing a structured JSA program is fundamental to preventing workplace injuries, fatalities, and environmental incidents.
This comprehensive guide covers everything you need to know about conducting a Job Safety Analysis, breaking down complex tasks into safe, manageable procedures, and integrating JSAs into your daily operations.
At FreeDocumentsHub, we specialize in providing high-quality, field-ready documentation, safety guides, and operational standards tailored for the oil and gas industry.
Download Ready-to-Use Templates
We have uploaded a comprehensive library of oil and gas templates available directly on Gumroad and Payhip. Whether you need standard forms, safety checklists, or operational frameworks, explore our selection of both free and premium downloadable templates:
- Visit Our Gumroad Store: [ https://iftakhar.gumroad.com/ ]
- Visit Our Payhip Store: [ https://payhip.com/b/pLP7W ]
Custom & End-to-End Documentation Services
In addition to downloadable templates, we provide complete, professional documentation management services remotely for your entire project scope, specific contracts, or custom organizational requirements:
- Full Project Documentation: End-to-end development of safety manuals, operating procedures, and risk management systems.
- Contract-Specific Documentation: Custom-tailored documents compliant with international safety standards and client requirements.
- Free Trial & Sample Documents: We offer free document trials and sample packages so you can evaluate our work before committing.
Get in Touch
Need customized documents or want to request a free trial sample? Contact our engineering and documentation team today:
- Email: contact@freedocumentshub.com
What is a Job Safety Analysis (JSA)?
A Job Safety Analysis (JSA) is a systematic risk assessment technique used to identify hazards associated with specific job tasks and determine the safest controls to eliminate or mitigate those risks.
Instead of viewing a job as one broad activity, a JSA breaks the job down into sequential steps, examines each step for potential health and safety hazards, and specifies safety controls for every identified risk.
Key Objectives of a JSA:
- Identify Hidden Hazards: Detect physical, chemical, biological, and ergonomic hazards before work begins.
- Establish Safe Operating Procedures: Standardize the correct, safest way to execute every step of a task.
- Engage Employees: Involve field operators, engineers, and safety personnel in risk management.
- Ensure Regulatory Compliance: Help organizations comply with standards set by safety authorities such as OSHA (Occupational Safety and Health Administration) and regional safety regulatory bodies.
JSA vs. JHA vs. Risk Assessment: What is the Difference?
While the terms are often used interchangeably, understanding their nuanced differences helps structure your safety documentation correctly:
| Feature | Job Safety Analysis (JSA) | Job Hazard Analysis (JHA) | Task Risk Assessment (TRA) |
| Primary Focus | Task sequence & step-by-step procedures | Specific physical hazards of a job | Broader risk evaluation and risk scoring |
| Scope | Specific daily work activities | High-risk, routine, or non-routine tasks | High-level facility or project processes |
| Usage | Field level, pre-job briefing, PTW integration | Safety planning, job standard design | Engineering design, facility management |
In practice, JSA and JHA follow the exact same core methodology.
Why is a Job Safety Analysis Critical in High-Risk Industries?
In high-hazard environments like oil and gas processing plants, offshore platforms, refineries, and construction sites, minor oversights can lead to catastrophic incidents.
- Reduces Workplace Injuries and Fatalities: By identifying hazards during planning, workers do not encounter unexpected dangers mid-operation.
- Serves as a Training and Onboarding Tool: Completed JSA worksheets provide clear, step-by-step instructions for training new employees on specialized, high-risk tasks.
- Enhances Permit to Work (PTW) Systems: A JSA acts as the backbone of a Permit to Work (PTW) system by ensuring all control measures are identified before a permit is authorized.
- Fosters a Strong Safety Culture: Involving site engineers, supervisors, and front-line technicians in the JSA process creates a culture of shared responsibility and continuous awareness.
When Should You Conduct a Job Safety Analysis?
While performing a JSA for every task in an organization is ideal, practical resource management requires prioritizing tasks. A JSA should be performed for:
- Jobs with High Injury/Illness Rates: Tasks where near-misses, incidents, or injuries have previously occurred.
- Jobs with Severe Potential Consequences: High-hazard tasks where an error could result in severe injury, disability, or property loss (e.g., hot work, confined space entry, heavy lifting).
- New or Modified Tasks: Tasks involving newly introduced equipment, machinery, chemical agents, or modified operational workflows.
- Infrequently Performed Jobs: Tasks done rarely (e.g., annual maintenance shutdowns, turnaround turnarounds) where operators may not be fully familiar with the steps.
- Complex, Multi-Crew Operations: Tasks requiring coordination between multiple contractors, disciplines, or teams.
The Core Elements of a JSA Form
A standard, field-ready Job Safety Analysis form consists of four key sections:
- Administrative Information:
- Job Title / Task Description
- Location / Facility / Department
- Date and Time
- Permit to Work (PTW) Reference Number
- JSA Team Members / Lead Supervisor Name
- Step-by-Step Task Breakdown:
- Logical sequence of steps required to complete the job.
- Hazard Identification for Each Step:
- Potential physical, chemical, environmental, or operational hazards linked to each specific step.
- Control Measures and Preventative Actions:
- Specific engineering, administrative, and PPE controls implemented to eliminate or control each hazard.
Step-by-Step: The Best Way to Create an Effective JSA
Creating a thorough JSA involves a systematic 5-step process. Following these steps ensures complete coverage of all job hazards.
+-------------------------------------------------------+
|  Step 1: Select the Job & Form the Team               |
+-------------------------------------------------------+
                           |
                           v
+-------------------------------------------------------+
|  Step 2: Break the Job into Sequential Steps          |
+-------------------------------------------------------+
                           |
                           v
+-------------------------------------------------------+
|  Step 3: Identify Hazards for Each Step               |
+-------------------------------------------------------+
                           |
                           v
+-------------------------------------------------------+
|  Step 4: Develop Control Measures (Hierarchy of Controls)|
+-------------------------------------------------------+
                           |
                           v
+-------------------------------------------------------+
|  Step 5: Review, Communicate, and Update              |
+-------------------------------------------------------+
Step 1: Select the Job and Form a Multidisciplinary Team
Never write a JSA in isolation at a desk. An effective JSA requires input from the people who perform the actual work.
- Form a Team: Include a Safety Specialist, Site Supervisor, Experienced Operator/Technician, and Maintenance Engineer.
- Observe the Work Environment: Inspect the work area, tools, materials, and atmospheric conditions prior to writing the document.
Step 2: Break the Job into Sequential Steps
Divide the overall task into distinct, chronological operational steps.
- Keep steps clear and concise: Use action verbs (e.g., “Disconnect power supply,” “Isolate pressure valve,” “Rig crane hook”).
- Avoid making steps too broad: A step like “Fix the pipe” is too general and misses crucial hazards.
- Avoid making steps too detailed: Breaking down a job into 30 tiny steps makes the document overly long and unreadable. Aim for 5 to 10 sequential steps per task.
Step 3: Identify Hazards for Each Step
For every step identified, ask critical safety questions:
- What can go wrong?
- What are the potential consequences?
- How could an operator get injured?
Common Workplace Hazards to Evaluate:
- Physical Hazards: Falling objects, pinch points, sharp edges, high pressure, high noise, rotating parts.
- Electrical Hazards: Exposed wiring, high voltage, stored static energy, ungrounded machinery.
- Chemical Hazards: Toxic gases ($H_2S$), flammable vapors, acidic spills, volatile organic compounds.
- Environmental Hazards: Extreme heat/cold, slippery surfaces, inadequate lighting, poor ventilation.
- Ergonomic Hazards: Manual heavy lifting, repetitive motion, awkward postures, prolonged standing.
Step 4: Develop Hazard Control Measures
For each hazard identified, apply the Hierarchy of Controls to establish risk prevention measures. Controls must be actionable and clear—avoid vague statements like “Be careful” or “Pay attention.”
                +------------------------------+
                |         ELIMINATION          |  <-- Most Effective
                +------------------------------+
                |        SUBSTITUTION          |
                +------------------------------+
                |     ENGINEERING CONTROLS     |
                +------------------------------+
                |   ADMINISTRATIVE CONTROLS    |
                +------------------------------+
                |            PPE               |  <-- Least Effective
                +------------------------------+
- Elimination: Remove the hazard entirely (e.g., de-energizing a power circuit prior to work).
- Substitution: Replace hazardous equipment or chemicals with safer alternatives (e.g., using water-based solvents instead of toxic chemicals).
- Engineering Controls: Isolate people from hazards physically (e.g., installing machine guards, pressure relief valves, local exhaust ventilation).
- Administrative Controls: Change the way people work through standard procedures, safety signage, rotating shifts, LOTO (Lockout/Tagout), and training.
- Personal Protective Equipment (PPE): Protect the worker with physical equipment (e.g., hard hats, safety harnesses, chemical goggles, flame-resistant clothing, respiratory protection).
Step 5: Review, Communicate, and Update
A JSA is a living safety document that must be put to immediate practical use.
- Pre-Job Safety Meeting (Toolbox Talk): Before starting work, review the completed JSA with all crew members involved. Verify everyone understands the hazards and control measures.
- Sign-off: Have all workers sign the JSA form confirming their understanding of the steps and hazards.
- Post-Job Review: If unexpected hazards occur during the task, pause the job, update the JSA, and re-communicate the updated measures to the team.
Practical Example: JSA for Replacing a Flange Gasket in a Pressurized Chemical Line
To illustrate how a JSA is structured in practice, below is a complete JSA matrix for a mechanical piping replacement task:
| Step No. | Task Sequence | Potential Hazards | Control Measures (Hierarchy of Controls) |
| 1 | Obtain work permit and prepare the work area. | * Unauthorized entry * Work on active process line | * Issue authorized Permit to Work (PTW). * Conduct pre-job toolbox talk with entire crew. * Install barricades and safety warning signs around the work area. |
| 2 | Isolate and depressurize the chemical piping system. | * Stored hazardous pressure * Toxic/corrosive chemical splash | * Execute Lockout/Tagout (LOTO) process. * Double-block and bleed isolation valves. * Verify zero energy state using calibrated pressure gauges. |
| 3 | Unbolt line flange bolts carefully. | * Trapped residual line pressure * Chemical residual spray * Hand/finger pinch injuries | * Wear full-face shield, chemical apron, and chemical-resistant gloves. * Loosen back bolts first, angling flange opening away from technician. * Use proper impact wrenches and hold-back tools to avoid pinch points. |
| 4 | Remove old gasket and install new gasket. | * Sharp flange edges * Dropping tools or heavy flanges | * Wear cut-resistant safety gloves. * Use mechanical lifting aids or secondary support riggings for heavy flange sections. * Keep work area clear of clutter. |
| 5 | Tighten flange bolts to required torque specification. | * Ergonomic strain/back injury * Bolt over-torquing or failure | * Use a calibrated torque wrench in a cross-star pattern. * Maintain proper body mechanics and posture during torquing. |
| 6 | De-isolate and conduct pressure testing. | * Sudden flange leak or blowout | * Clear all non-essential personnel prior to re-pressurization. * Gradually re-pressurize system while observing pressure readouts from a safe distance. |
Top 7 Common Mistakes to Avoid When Creating a JSA
- Making the JSA Too Vague: Avoid generic phrases like “Be safe” or “Use caution.” Use specific instructions like “Attach double-lanyard harness to anchor point rated for 5,000 lbs.”
- Writing JSAs in an Office Without Field Input: Desk-written JSAs often miss real-world operational factors such as space constraints, weather conditions, or equipment wear.
- Confusing Job Steps with Hazards: A job step is what you do (e.g., “Climb ladder”); a hazard is what can harm you (e.g., “Slippery rungs, potential fall from height”).
- Treating JSA as Just Paperwork: A JSA is an active risk management tool, not a bureaucratic box to check for compliance.
- Ignoring Environmental and Weather Conditions: Rain, high wind, intense heat, or poor lighting directly alter task hazards and must be accounted for on-site.
- Failing to Update JSAs: Using old, outdated JSA templates without updating them for new equipment or modified procedures leads to gaps in safety coverage.
- Not Involving Subcontractors: Third-party contractors must review, align with, and sign the JSA prior to starting work alongside internal staff.
Best Practices to Digitalize and Streamline Your JSA Workflow
Modern safety-first organizations are moving away from paper-based JSAs toward digital EHS (Environment, Health, and Safety) software and mobile applications.
- Mobile JSA Mobile Forms: Enable workers to fill out, sign, and submit JSAs using ruggedized tablets or mobile smartphones directly at the job site.
- Standardized Hazard Libraries: Build pre-populated dropdown lists of common equipment, hazards, and controls to maintain consistency across facilities.
- Integration with Permit to Work (PTW) Systems: Automatically link JSAs to active permits, Lockout/Tagout (LOTO) charts, and safety isolation certificates.
- Real-time Approval Workflows: Route completed JSAs instantly to safety managers and site leaders for fast, documented approvals without delaying operations.
Summary Checklist for Creating an Effective JSA
Before starting your next work task, use this checklist to ensure your Job Safety Analysis is complete:
- [ ] Has a multidisciplinary team (operators, supervisors, safety team) reviewed the job?
- [ ] Is the job broken down into 5 to 10 logical, sequential steps?
- [ ] Has every step been evaluated for physical, chemical, electrical, and ergonomic hazards?
- [ ] Are safety controls selected using the Hierarchy of Controls (Elimination $\rightarrow$ PPE)?
- [ ] Are all control measures specific, clear, and actionable?
- [ ] Has a pre-job safety briefing (Toolbox Talk) been conducted with all active workers?
- [ ] Have all team members signed off on the final JSA form?